
< Previous | Contents | Next >
2.1. Ubuntu Desktop Components
GNOME is the default desktop environment for Ubuntu. GNOME (GNU Network Object Model Environment) is an international effort to build a complete desktop environment—the graphical user interface, which sits on top of a computer operating system—entirely from free software. This goal includes creating software de- velopment frameworks, selecting application software for the desktop and working on the programmes which manage application launching, file handling and window and task management. Community members world- wide contribute to the translation and accessibility of the desktop in multiple languages. (Reference: http:// en.wikipedia.org/wiki/GNOME)
Key Desktop Components on Ubuntu. When you start your computer, the first screen displayed on Ubuntu is the logon screen, where you type your user name and password. The next screen displayed is the Ubuntu desktop. Ubuntu comes with a completely clean desktop background, free of icons by default.
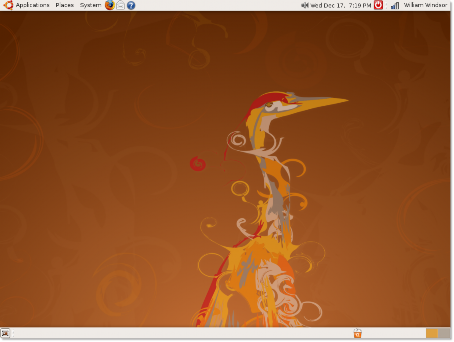
Figure 2.1. Default Ubuntu Desktop
You can arrange icons and files on the desktop to access them quickly. If a CD, hard disk or any other external device is connected to your computer, Ubuntu automatically displays its icon on the desktop to allow easy access to the device.
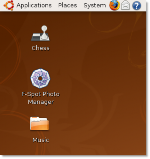
Figure 2.2. Desktop Icons
At the top and bottom of the desktop are two bars, called panels.
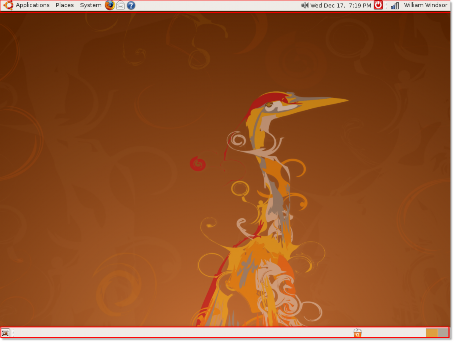
Figure 2.3. Desktop Panels
There are three main menus in the left pane of the top panel: Applications, Places and System.
• Applications: This menu contains all the applications installed on your computer such as games, music players, Web browsers and e-mail clients.
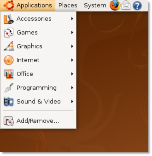
Figure 2.4. The Application Menu
• Places: This menu provides access to your home directory, external devices and network on your computer.
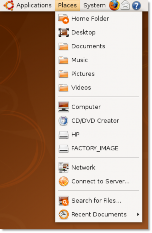
![]()
Note:
Figure 2.5. The Places Menu
The Home directory is created by default for every user and automatically takes the username. It contains all user-specific files. In a multi-user system, every user stores personal data in a sub- directory of this directory.
• System: This menu enables you to change the computer settings. You can also access the Ubuntu help system and turn off your computer here.

Figure 2.6. The System Menu
By default, there are three shortcut icons next to the menus on the top panel: Mozilla Firefox, Evolution and Help. You can create additional shortcuts to any applications and place them here for quick access.
![]()
Figure 2.7. The Shortcut Icons Procedure 2.1. To add a new shortcut icon to the desktop panel:
1. Right-click the blank area of the top panel and click Add to Panel. The Add to Panel dialogue box appears.
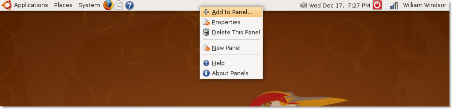
Figure 2.8. Adding a Shortcut Icon
2. The Add to Panel dialogue box displays a list of applications available on your computer. Select an ap- plication and click Add to add it to the blank area of the desktop. If you want to launch the programmes available on the Applications menu, click Application Launcher.
![]() Note:
Note:
Alternatively, you can drag an application icon from the Add to Panel dialogue box and drop
the icon on the panel to create a short cut to the application.
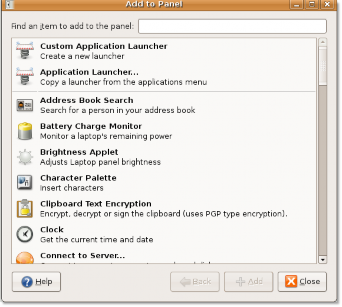
Figure 2.9. Adding Application Launchers
3. The applications grouped in a category similar to the Applications menu appears. Select an application from the available list, and click Add.

Figure 2.10. Selecting Applications
The icon of the selected application will be displayed on the blank area of the top panel.
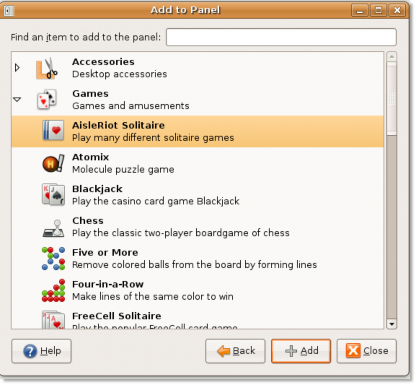
Figure 2.11. Adding Application Launchers
You can change the location of the newly created shortcut icon by right-clicking it and selecting Move. Move the icon anywhere on the top panel and left-click the icon to freeze its location.
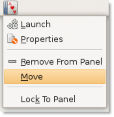
Figure 2.12. Moving Shortcut Icons
Next to the blank area on the top panel (where you can create short cuts of the application) is the fast user switch icon. This icon shows the current user of your computer. You can click the icon to view other users on the computer and switch to another user.
![]() Note:
Note:
You will learn more about fast user switching in the Fast User Switching topic of this lesson.

Figure 2.13. The Fast User Switch Icon
The System tray contains the network and sound icons for quick access to network and sound settings. You can check the network configuration of the computer and adjust the volume of your computer's speaker.
The current date and time is displayed next to the System tray. If you click the date and time, a calendar is displayed.
The last icon on the top panel shuts down, restarts, hibernates, locks your computer and places it on standby.
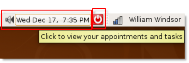
Figure 2.14. Top Panel Icons
The first icon on the bottom panel provides quick access to the desktop. If multiple windows are open on your desktop and you would like to minimise all of them together, click this icon. Clicking again will display your windows in their original state, before you minimised them.
![]()
Figure 2.15. Show the Desktop
Next to the icon used to minimise the windows is a blank area in which the list of open application windows appears, similar to the taskbar in Windows. When you open an application, it's listed on this area for easy access, as shown in the bottom panel of the following screen:
![]()
Figure 2.16. Open Applications
The next icon, workspace, enables you to split the windows that are open on your desktop into multiple workspaces. You can then navigate among the workspaces by pressing and holding down the CTRL+ALT keys, and then pressing either the left or the right arrow key. This reduces the clutter on your desktop and eases nav- igation between windows.
For example, you might have the Firefox window, an OpenOffice application, a search window and a calculator window open on the desktop.
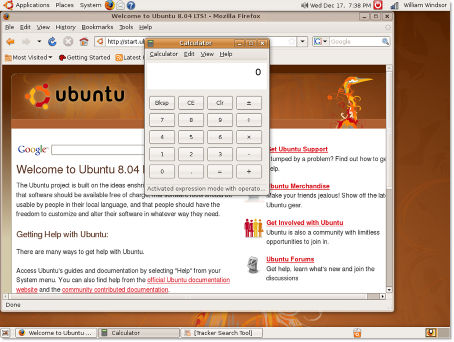
Figure 2.17. The Workspace Icon
You can move the Firefox window to a separate workspace by pressing and holding down the CTRL+ALT
+SHIFT keys and then pressing the left or the right arrow key. Two workspaces will be displayed in the bot- tom-right corner of the desktop - one workspace with the Firefox window and the original workspace with the other windows.
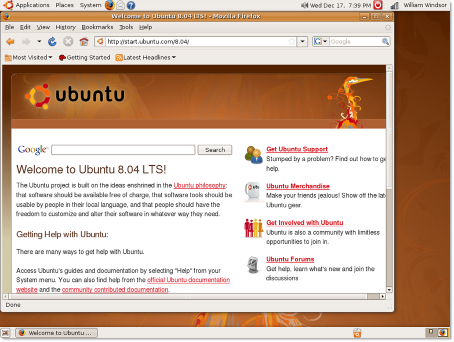
Figure 2.18. Switching Workspaces
Now, you have two separate workspaces. Notice that the Firefox window has shifted to the original workspace. So, depending on the task you perform, you can split the windows into different workspaces.
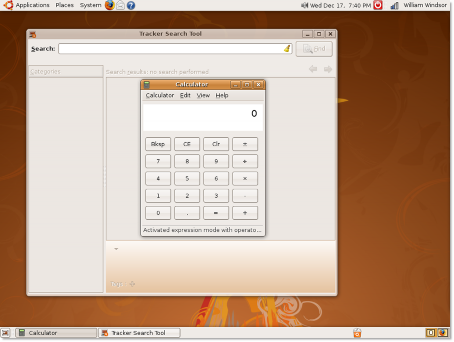
Figure 2.19. Splitting Windows into Workspaces
By default, Ubuntu provides two workspaces. If you want to split the windows into more workspaces, you have to add the workspace to the desktop by right-clicking the workspace icon and then clicking Preferences. The Workspace Switcher Preferences dialogue box appears.
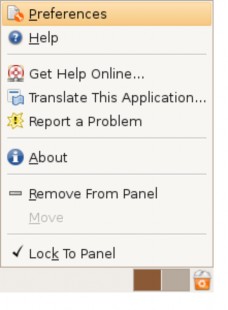
Figure 2.20. Creating New Workspaces
In the Workspace Switcher Preferences dialogue box, type or select the number of workspaces from the Num- ber of workspaces list and click Close.
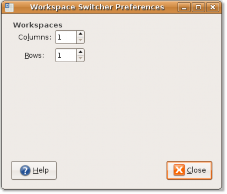
Figure 2.21. Workspace Switcher Preferences
The specified number of workspaces will be displayed in the bottom-right corner of the desktop.
The last icon in the bottom panel is the Waste basket. It contains the files you deleted from your computer. Right-click the icon and click Open to open the Trash window.
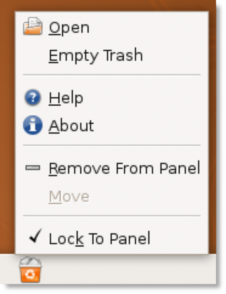
Figure 2.22. The Waste Basket Icon and Menu
You can delete an item permanently from the computer by pressing the DELETE key.
![]() Note:
Note:
Alternatively, you can right-click the item and click Delete from Trash to permanently delete it
from the computer.
If you want to restore the deleted item to the desktop, drag that item to the desktop from the Trash window.
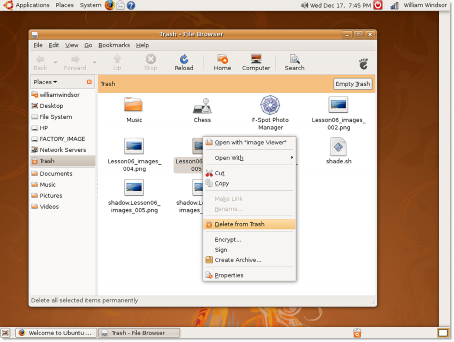
Figure 2.23. Deleting Items from Trash