
< Previous | Contents | Next >
3.4.1. Using Evolution Mail
Procedure 3.7. To configure the Evolution e-mail client on Ubuntu:
1. On the Applications menu, point to Internet and click Evolution Mail.
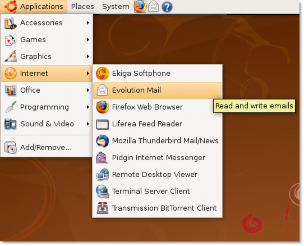
Figure 3.20. Launching Evolution Mail
![]() Nice to Know:
Nice to Know:
The .evolution directory is created in the home directory when you run Evolution for the first
time. It saves its local data in this directory. Then, it opens a first-run assistant to help you set up the e-mail accounts. User specific settings for evolution are also stored in .gconf/apps/ evolution.
The Evolution Setup Assistant is displayed and guides you through various steps to enable Evolution to connect to your e-mail accounts and import files from other applications. Click Forward.
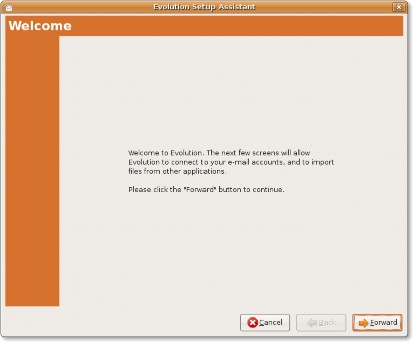
Figure 3.21. Configuring New E-mail Account
2. Evolution offers an integrated backup system. If you migrate your Evolution data from one system to another, use this dialogue. On the Restore from backup page, you can restore the backup files such as, e- mails, memos, address book, personal files and many more from your older version of Evolution.
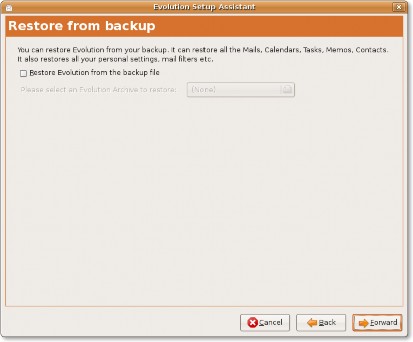
Figure 3.22. Restoring Evolution
3. On the Identity page, type your full name in the Full Name box and your e-mail address in the E-mail Address box. This is the e-mail address that your ISP provides. Your Evolution account is configured with this information. Click Forward.
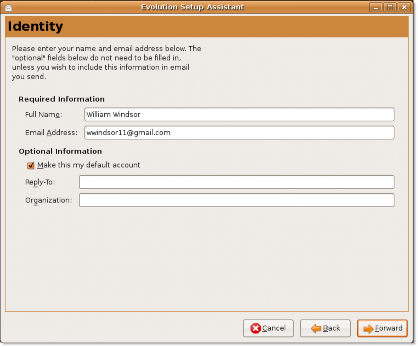
Figure 3.23. Setting up Account Identity
![]() Note:
Note:
You can skip the information in the Optional Information section. You are required to type
the information in the Reply-To and Organisation boxes, only if you want to include this in the e-mail messages you send. In Reply-To box, you can type your name, favourite quotes or any other information and, in the Organisation box, type any name such as that of your organisation, school or college.
4. On the Receiving E-mail page, in the Server Type box select the type of server your ISP provides. Evo- lution is compatible with numerous server types, but POP is commonly used to receive e-mail messages.
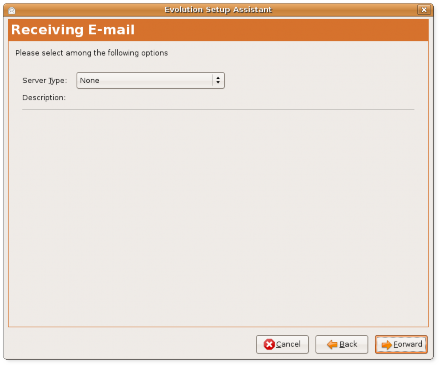
Figure 3.24. Selecting Server Type for Receiving E-Mail
![]() Note:
Note:
If you do not know the server information, you should contact your system administrator or ISP.
a. Select POP from the Server Type box to connect to and download mail from POP servers. The Receiving E-mail page will further prompt you for the configuration information.
![]() Note:
Note:
For more information about server types, refer to: https://help.ubuntu.com/communi-
ty/EmailClients.
b. Type the receiving e-mail server name in the Server box and your account user name in the Username
box. This is not your login name to your PC but your login name to your ISP's e-mail account.
c. In the Security section, you can select Encryption or No encryption in the Use Secure Connection
box. Encryption makes the message unreadable by anyone other than the intended recipient.
d. Select Password in the Authentication Type box or click Check for Supported Types to have Evo- lution check for supported authentication types. The crossed out authentication types are not support- ed. Generally, the password is the way you authenticate with the server.
![]() Note:
Note:
Contact your system administrator or ISP to know about the authentication type supported.
e. Click Forward.
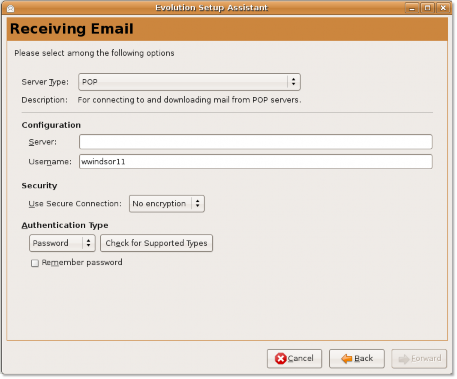
Figure 3.25. Providing POP Server Information
5. On the Receiving Options page , select the following options, if required:
a. To automatically check e-mail messages after a particular interval of time, select Automatically check for new mail every check box. Specify the duration of the interval in the minutes list.
b. In the Message storage section, select Leave message on server check box , if you want to leave a message on the server.
c. Select Disable support for all POP3 extensions check box, if you want to disable POP3.
d. Click Forward.
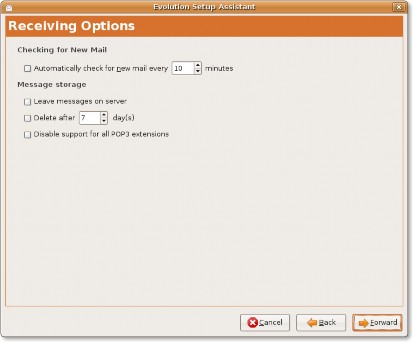
Figure 3.26. Specifying Mail Checking and Storage Options
6. On the Sending E-mail page, specify the information according to the way you want to send e-mail mes- sages. Select the outbound mail server in the Server Type box.
a. There are two methods you can use to send e-mail messages, SMTP and Programmes Send Mails. SMTP is the common method that is used to send e-mail messages. Select SMTP as your outbound mail server type in the Server Type box.
b. Specify the outbound server configuration:
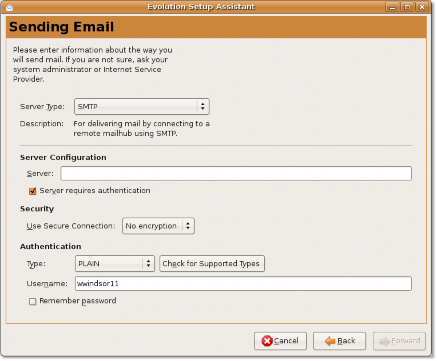
Figure 3.27. Providing SMTP Server Information
i. Type the host address in the Server box. This is the address of the outbound server that your ISP provides.
ii. Specify how you want the server to authenticate. Select Server requires authentication check box, if your server requires authentication. You will be asked to select your authentication type in the Type box. You can also click Check for Supported Types to have evolution check for supported types.
iii. Type the evolution account user name in the Username box.
iv. Select Remember Password check box, if you want evolution to remember your password. Then, click Forward. The Account Management page is displayed.
7. It is possible for Evolution to access multiple e-mail providers. To differentiate between them, you can give each e-mail provider a name. Type a name for this configuration or your account in the Name box. You can type any name you prefer as this is only for your reference. Then, click Forward.
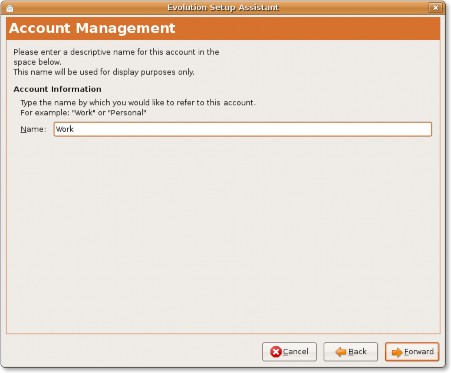
Figure 3.28. Providing Account Information
8. On the Timezone page, select the time zone you are in, either on the map or from the Selection list. Click
Forward.
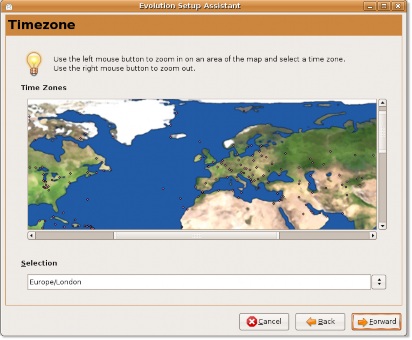
Figure 3.29. Specifying Timezone
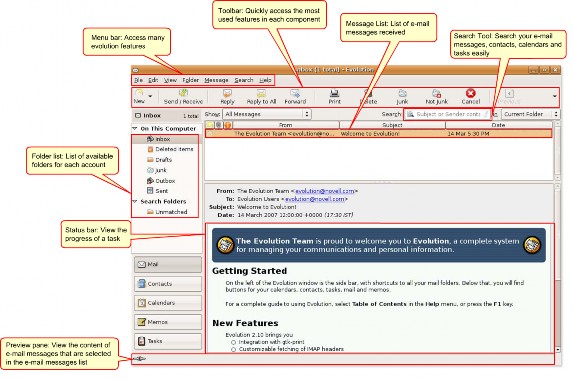
9. Configuration is done. Click Apply to save your settings. The Evolution window will be displayed.
![]()
Note:
Figure 3.30. Evolution
For more information on how to use the Evolution e-mail client, refer to: https:// help.ubuntu.com/8.04/internet/C/email.html.