
< Previous | Contents | Next >
3.6.1. Using Ekiga
Ekiga is an open source softphone application for Ubuntu. It is a free Voice over IP (VoIP) and video confer- encing application. VoIP routes voice conversations over the Internet or through any other IP-based network. You can use Ekiga to call, send instant messages and be contacted by other Ekiga users.
The First Time Configuration Assistant helps you configure Ekiga. It appears automatically when you open Ekiga for the first time.
Procedure 3.11. To configure Ekiga on Ubuntu:
1. On the Applications menu, point to Internet and click Ekiga. The Configuration Assistant page will be displayed. Click Forward.
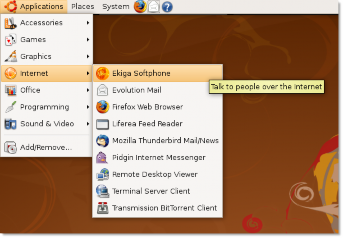
Figure 3.49. Launching Ekiga Softphone
2. On the Personal Information page, type your full name in the Please enter your first name and your surname box. The name that you specify is used for display purposes when you connect to other audio or video applications. Click Forward.
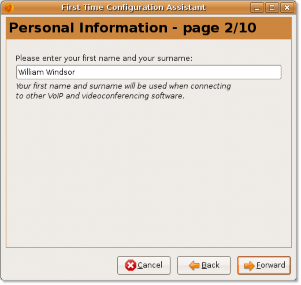
Figure 3.50. Specifying Display Name
3. On the ekiga.net Account page, type your Ekiga's account user name and password that you use to log in to your existing Ekiga account. You will get this detail from the ekiga.net free SIP service. Click Forward.
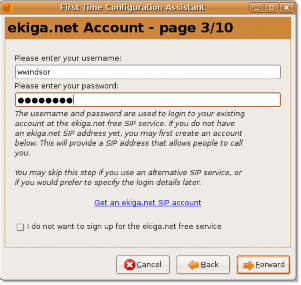
Figure 3.51. Specifying ekiga.net Account Username and Password
![]() Note:
Note:
If you do not have an SIP account, you can click the link Get an ekiga.net SIP account on
the page to create an SIP account on ekiga.net.
4. On the Connection Type page, select the type of Internet connection you are using on your computer from the Please choose your connection type box. This connection type determines the best quality settings
that Ekiga will use during calls. If you do not know the connection type, contact your system administrator. Click Forward. You can change these settings later.
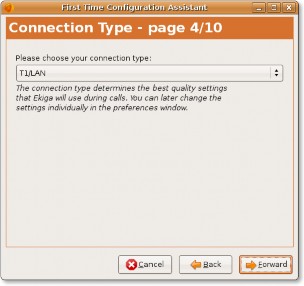
Figure 3.52. Selecting Connection Type
5. On the NAT Type page, click Detect NAT Type. It informs you which Network Address Translation (NAT) type was detected and automatically configures Ekiga to transparently cross your router. So, NAT avoids all the problems associated with reserving IP addresses. Click Forward.
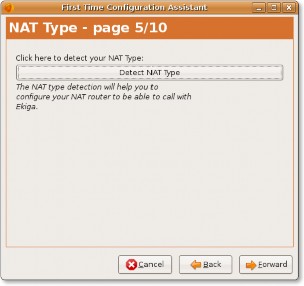
Figure 3.53. Selecting NAT Type
![]() Note:
Note:
To learn more about NAT, refer to: http://en.wikipedia.org/wiki/Network_address_translation.
6. On the Audio Manager page, select the audio manager, which is the plug-in, according to the sound card of your computer. The audio manager is a plug-in that manages your audio device and is dependant on the operating system on your computer. Though it is recommended to use ALSA, you should check with your
your system administrator to identify the appropriate audio manager for the audio device that you want to use. Then, click Forward.
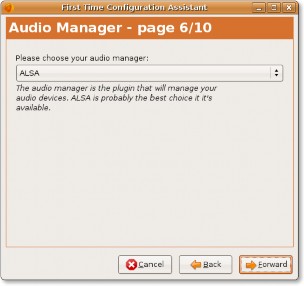
Figure 3.54. Selecting Audio Manager
7. Ekiga requires audio output and input devices to play and record sound files. The audio output device is used to play audio and audio input device to record your voice. So, on the Audio Devices page, select the audio output and input devices. For example, headset or speakers are the output device and your microphone the audio input device. Now, click Test Settings to check the functionality of audio devices and the click Forward.
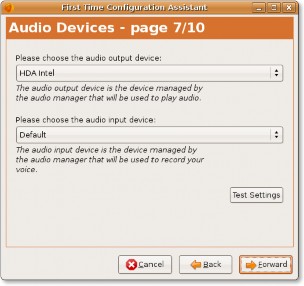
Figure 3.55. Selecting Audio Devices
8. On the Video Manager page, select the video manager, which is the plug-in used to manage your video devices. You can select Video4Linux to manage Webcams or AVC / DC for Firewire cameras. Click For- ward.
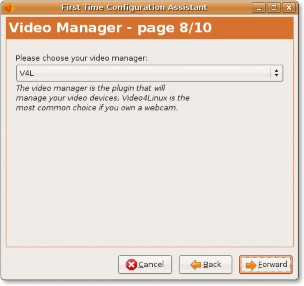
Figure 3.56. Selecting Video Manager
9. On the Video Devices page, select the video input device from the Please choose the video input device box. The video input device is the device managed by the video manager that will be used to capture video. If you do not want to do video conferencing or if you do not have a video device, you may skip this page.
Click Test Settings to ensure that your video device works with Ekiga. Click Forward.
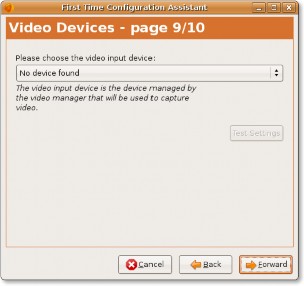
Figure 3.57. Selecting Video Devices
10. The configuration of Ekiga is now complete. This window displays a configuration summary of the settings you have selected. You can verify your settings here. If you want to make any modification, navigate to the required page by using Back and Next and make appropriate changes. Click Apply to save the configuration.
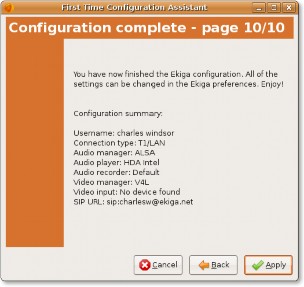
Figure 3.58. Account Configuration Summary
The Configuration Assistant will close.
![]() Note:
Note:
After installing Ekiga, if you want to modify any configuration, you can run the configuration
assistant again by Preferences on the Edit menu in the Ekiga window.
![]() Nice to Know:
Nice to Know:
For more information on Ekiga, refer to http://www.ekiga.org.
The Ekiga window will be displayed. It is the default softphone application available on Ubuntu.
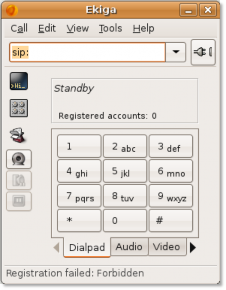
Figure 3.59. Ekiga Window
Making Calls Using Ekiga
From Computer to Computer
Using Ekiga, you can call anyone who is registered to the public SIP provider and uses SIP software or hardware. You can use the online address book of Ekiga to find the SIP addresses of other Ekiga users. It is of course possible to call non-Ekiga users, registered to any public SIP provider. To make calls, type the URL address of the user you wish to call in the sip: : input box and click the connect icon on the right of the text box. With the default setup, you can simply type sip:foo to call user [email protected].
From Computer to Regular Phones
You can use Ekiga with multiple ISPs. There is a charge for this service so you will need to create an account with the provider first. After the account is created, you will receive a login and a password by e-mail. Simply enter them in the Ekiga dialogue box, select Use PC-To-Phone service and you are ready to call regular phones using Ekiga. With the default setup, you can simply use sip:00911129535955 to call the real phone number 003210444555, 00 is the international dialling code, 91 is the country code and 1129535955 is the number to call.
From Real Phones to Computer
You can also use Ekiga to receive incoming calls from regular phones. For this, you have to login to PC-To- Phone account and purchase a phone number. Ekiga then rings, when people call you at that phone number.
![]() Note:
Note:
To learn more about making phone calls by using Ekiga, refer to http://www.ekiga.org/index.php?
rub=3.