
< Previous | Contents | Next >
4.2.2. Performing Basic Word-Processing Tasks
You can perform a number of word-processing tasks, such as writing, editing, formatting, reviewing and printing documents, using OpenOffice.org Writer. The word processor also allows you to use various templates, apply different styles to your document, control your page layout and insert, edit and create graphics inside your text document. Instructions to perform some of the basic word-processing tasks in Writer are described in the following sections.
Entering and Formatting Text. OpenOffice.org Writer is primarily used for writing and formatting text. You can enter text using your keyboard and then apply a variety of formats to the text, as per the document's requirements.
Procedure 4.1. You can use the following steps to enter and format text using OpenOffice.org Writer:
1. On the Applications menu, point to Office and then click Openoffice.org Word Processor. A blank text document opens.
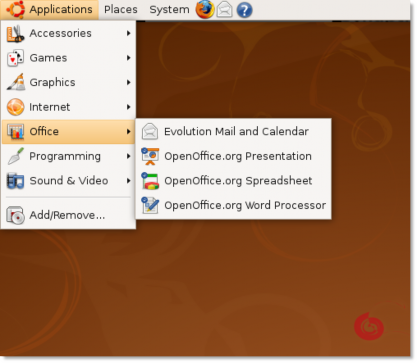
Figure 4.2. Launching Writer
2. Depending on what you want to do, you can either create a letter, memo, note or an entire novel from scratch, or you may start with a predefined template or sample that is suitable for your requirements.
To access the templates and samples, on the File menu, point to New and then click Templates and Doc- uments. Alternatively, you can press SHIFT+CTRL+N. The Templates and Documents dialogue box opens.
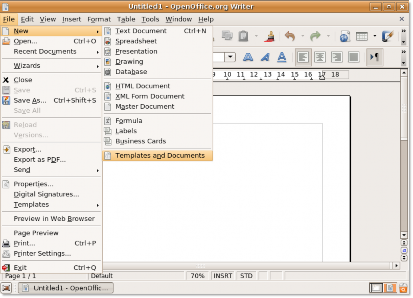
Figure 4.3. Accessing Templates and Documents
3. You can view the various categories of available templates in the middle column of the Templates and Documents dialogue box. If you want to use a template to create your document, you can double-click a category. This will display the various templates associated with that category. Select a template of your choice and then start working on it.
However, you may also decide to work with the default blank document. To continue working with the blank document, exit the Templates and Documents dialogue box by clicking Close in the top-right corner of the dialogue box.
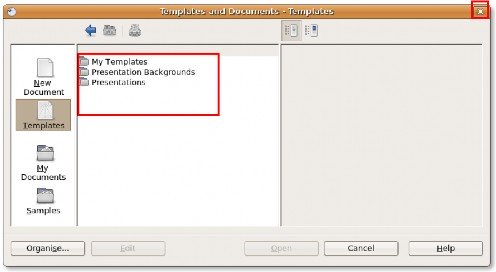
Figure 4.4. Accessing Templates
4. After you have created the document, you can use the various formatting features provided in Writer to change the text display or emphasise specific areas in your document. You can use the following options available on the Formatting toolbar to perform some of the most common formatting tasks.
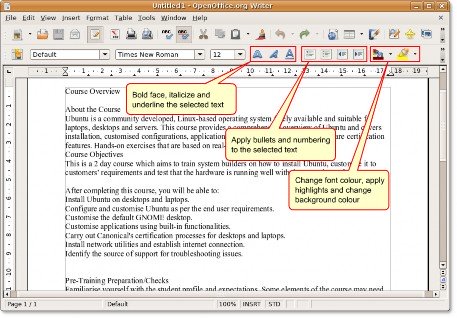
Figure 4.5. The Formatting Toolbar
5. You can use the Style and Formatting window to perform a complete document makeover.
To open the Style and Formatting window, on the Format menu, click Style and Formatting. The Style and Formatting window appears.
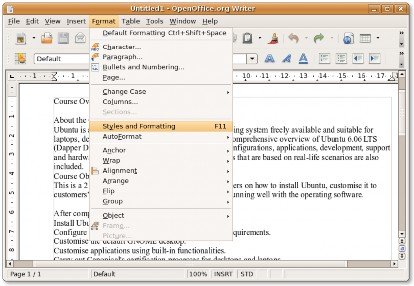
Figure 4.6. Accessing Style and Formatting Window
6. You can use this window to select and modify the existing style or create a new style. Clicking one of the icons below the title bar of the Style and Formatting window will display a list of styles in a particular category, such as a list or a paragraph.
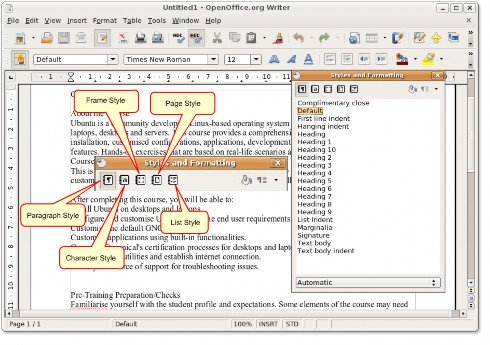
Figure 4.7. The Style and Formatting Icons
7. By default, when you open the Style and Formatting window, the Paragraph Style icon is selected. All the styles listed in this category are displayed in the Style and Formatting window. You can start restyling individual parts of the current document by selecting specific parts of the document and applying an existing style by double-clicking that style.
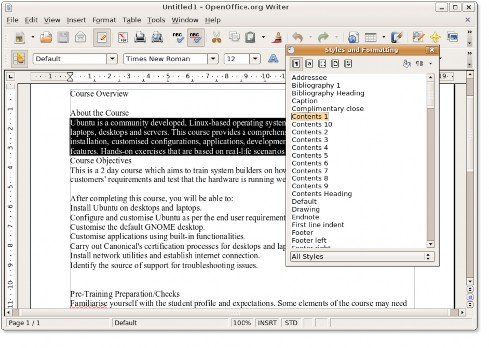
Figure 4.8. Applying a Style
8. However, if you want to modify an existing style, you can simply right-click that style and select Modify. This displays a new pop-up window. You can redefine almost all aspects of the selected style using the various options available under the different tabs.
Modify the specifications of the selected style, and click OK to apply the changes.
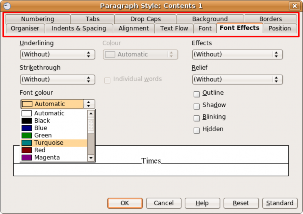
Figure 4.9. Modifying a Style
9. Double-click the modified style to reflect the changes in the selected text.
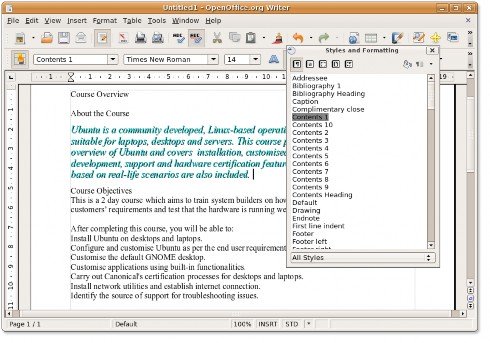
Figure 4.10. Applying the Modified Style
10. You can customize all other parts of the document in the same way.
Procedure 4.2. Inserting Tables
![]()
To insert a table in a text document, position the cursor where you want the table to appear and then follow the procedure described below:
1. On the Table menu, point to Insert and then click Table. The Insert Table dialogue box opens.
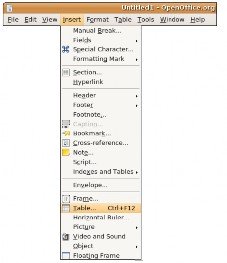
Figure 4.11. Inserting a Table
2. You can use the various options present in the dialogue box to specify some of the table properties.
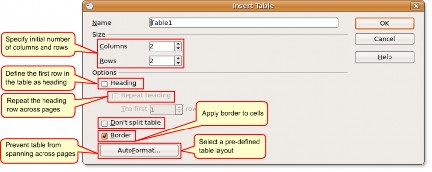
Figure 4.12. Specifying Table Properties
![]() Nice to Know:
Nice to Know:
To directly insert a table with the default properties, click the Table icon on the Standard toolbar
and select the table size in the graphic that appears. To create the table, click the cell that you want to be on the last row of the last column.
3. Specify the table properties and click OK. The table is inserted at the specified location in your text docu- ment. By default, Writer creates a table as wide as the page margins, with all the rows having the same height and all the columns having the same width. To adjust the column and rows and customise the table further, right-click the table and select Table from the short-cut menu. The Table Format dialogue box opens.
Now you can use this dialogue box to define finer specifications for the table such as alignment, column width, text flow, borders and background.
Define the table specifications as per your requirements and preferences, and click OK to apply the changes.
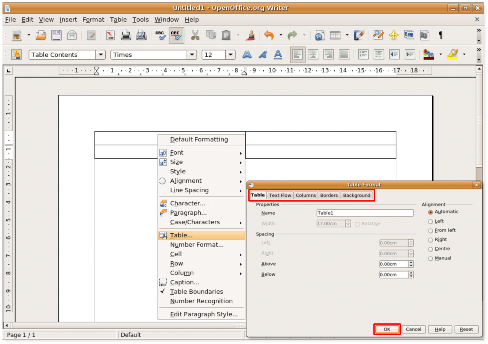
Figure 4.13. Customising the Table Format
4. The defined specifications are applied to the table. To arrange the data within one of the table cells into another table, you can create nested tables. Writer permits you to create as many layers of nested tables as you want.
To create a nested table, click the cell in which you want the nested table to appear, then follow the procedure for inserting a new table. A nested table appears in the specified cell within the larger table.
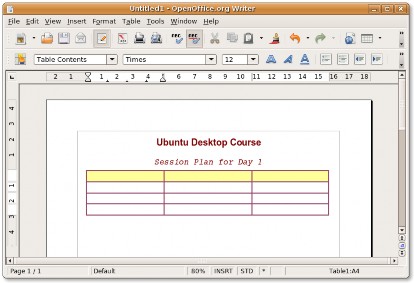
Figure 4.14. Creating a Nested Table
![]()
5. You can now define the finer specifications of the nested table using the Table Format dialogue box and then populate the table with data.
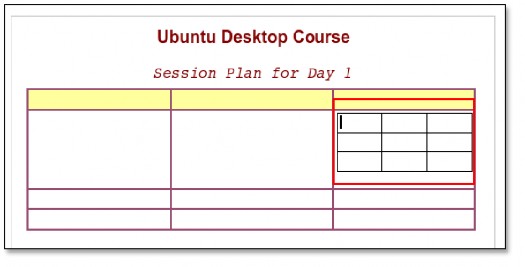
Figure 4.15. The Nested Table
Inserting Images. OpenOffice.org allows you to import images of various file formats, including the most common file types such as JPEG, PNG, BMP and GIF. Images can be inserted from a file, the OpenOffice.org Gallery, a scanner, the Internet, or a graphics programme.
Procedure 4.3. To insert an image into your text document from a file:
1. Position the cursor at the location in the document where you want the picture to be inserted. On the Insert
menu, point to Picture and then click From File. The Insert Picture dialogue box opens.
2. To insert the file, navigate to the desired file and select it. You can select the Preview check box at the bottom of the Insert Picture dialogue box to preview the selected image in a pane and verify whether you have selected the correct image. Click Open to insert the image in your document.
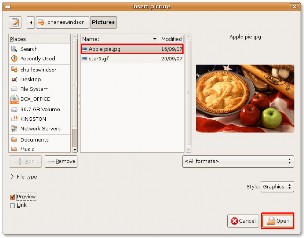
Figure 4.16. Inserting Image
3. The image is inserted at the specified location in your document. If the image does not fit perfectly into your document, you should resize it.
To resize the image while maintaining its proportions, select the image and then press and hold the SHIFT key. When you select an image, some square points (known as "handles") appear along its perimeter. While holding down the SHIFT key, click and drag one of the handles on the image to modify its size.
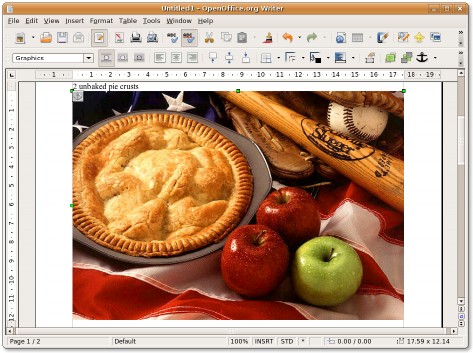
Figure 4.17. Resizing the Inserted Image
4. After you have resized the image, you need to position the image appropriately in the document. You can arrange and align images using the tools on the Frame toolbar, which appears below the Standard toolbar when you select a graphic for the first time.
Alternatively, you can right-click the image and then select from the available options, such as Arrange, Wrap or Anchor, on the short-cut menu.
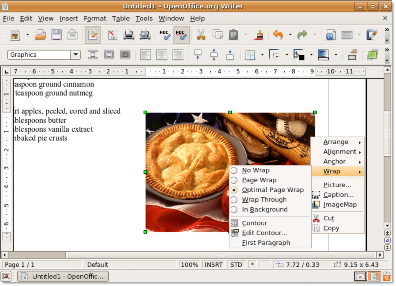
Figure 4.18. Positioning the Inserted Image
5. After you have selected appropriate positioning options for the image, you may obtain a result similar to the following screenshot.
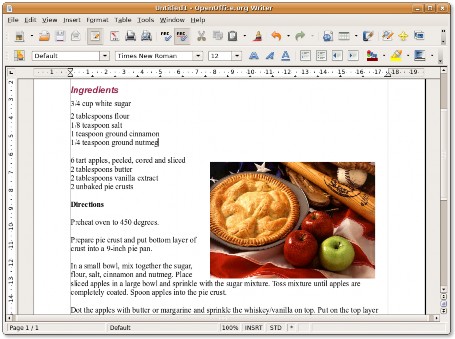
Figure 4.19. The Inserted Image Procedure 4.4. Printing Documents
1. On the File menu, click Print. The Print dialogue box opens. You can use this dialogue box to specify
the printer to be used (in case you have more than one printer installed on your system), the pages to be printed, and the number of copies to be printed. You can also click the Properties button in the Print dialogue box to define the properties of the printer, such as orientation, the paper tray to be used and the paper size to be printed.
To define printer options for the current document, click the Options button in the Print dialogue box.
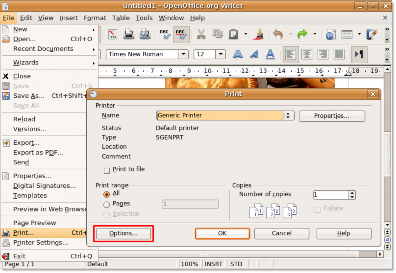
Figure 4.20. Printing a Document
2. The Printer Options dialogue box enables you to select specific sections from the current document for printing. For example, to save toner or ink, you may not want to print the background and the graphics in the document. You can specify these details under the Content section by selecting or clearing the appropriate check boxes.
Similarly, you can define the required printing options in the Pages and Notes section. After specifying the details, click OK to save your settings.
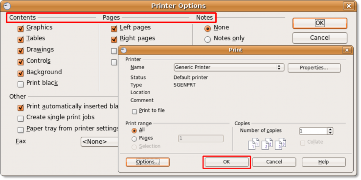
Figure 4.21. Defining Printer Options
3. You can now start printing the document by clicking OK on the Print dialogue box.
![]() Note:
Note:
Making changes in the Printer Options dialogue box will only apply to the current document
and not change your default settings permanently.
Procedure 4.5. Saving Documents
You can save your Writer document in the same way as you save any other document. To save a new text document:
1. On the File menu, click Save As. The Save dialogue box opens.
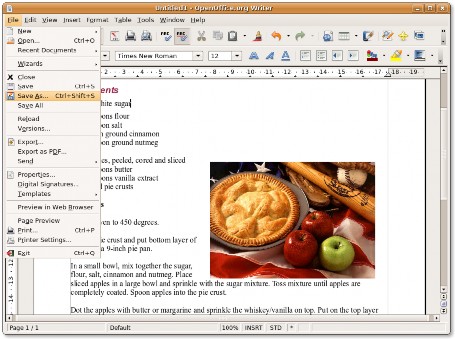
Figure 4.22. Saving the Document
2. Navigate to the directory where you want to save the file, enter the file name and click Save to save the file at the desired location.
OpenOffice.org also allows you to save your document in a number of other file formats, including Mi- crosoft Word, Rich Text, Star Writer and as an HTML document. This enables you to share your documents with other people who use other office applications, such as Office.
If you would like to save your current document as a Word file, select the appropriate type of Word format from the drop-down menu at the bottom of the dialogue box. Then, click Save to save the file as a Word document.
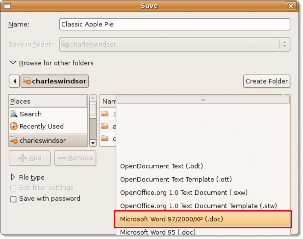
Figure 4.23. Saving in Word Format