
< Previous | Contents | Next >
4.4.2. Creating Multi-Media Presentations
Procedure 4.10. Creating, Viewing and Printing a Presentation
To create and view presentations using OpenOffice.org Impress:
1. On the Applications menu, point to Office and then click OpenOffice.org Presentation.
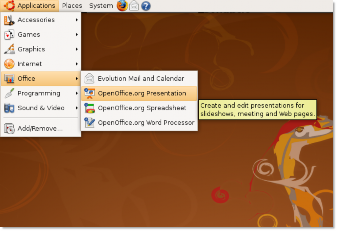
Figure 4.45. Launching Impress
2. The Presentation Wizard dialogue box appears. The Presentation wizard allows you to define the basic structure of a presentation in three brief steps. You can either continue defining the specifications as guided by the Presentation Wizard or immediately create a new blank presentation by clicking Create.
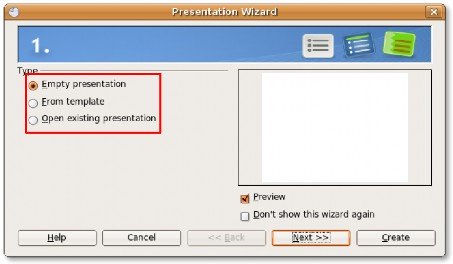
Figure 4.46. Using the Presentation Wizard
![]() Nice to Know:
Nice to Know:
To be able to preview the slide template, slide design and slide transition effects, leave the
Preview check box selected.
3. This figure shows the main Impress window with an empty presentation. From the Task pane on the left, you can select a layout for your current slide.
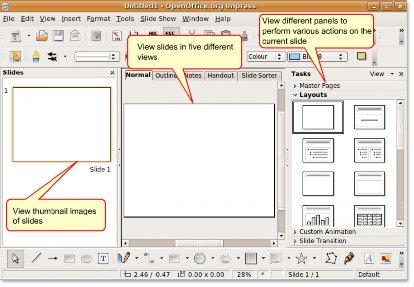
Figure 4.47. The Impress Window
4. Enter the required text in the provided text boxes to create the first slide. To make your presentation more attractive and professional looking, you can either change the background and format the font size and colour for each slide or simply select a pre-defined template from the Master Pages panel.
Click Master Pages to open the Master Pages panel.
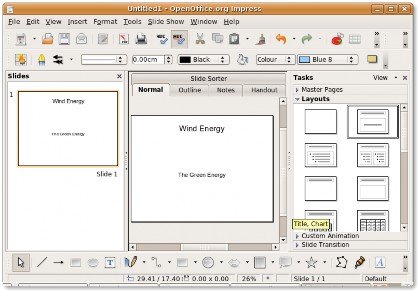
Figure 4.48. Opening the Master Pages Panel
5. A number of templates are available on the Master Pages panel. Select the template of your choice to apply a whole new look to your presentation. You can enhance the look of the presentation further by adding various elements, such as objects, pictures and animated images, from the Insert menu. Alternatively, you can start adding new slides to the presentation.
You can add a new slide by clicking the Slide button on the Standard toolbar. Alternatively, click Slide
on the Insert menu.

Figure 4.49. Selecting a Slide Template
6. The inserted slide is also formatted as the first slide because that is the layout you selected last. According to the requirements of your presentation, you can select a new format from the Layout pane. The new layout has two columns, one for text and the other for images. This allows you to display text along with an associated image on the same slide. Enter the textual content in the provided text boxes, then double-click the house icon to insert a graphic in the provided placeholder.
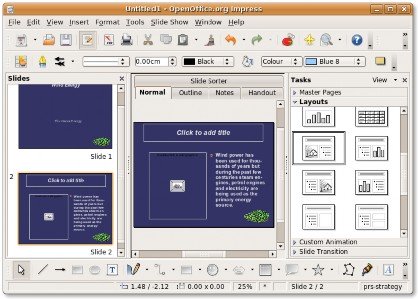
Figure 4.50. Selecting a Slide Layout
7. In the Insert Picture dialogue box, select the desired image and click Open to insert it into your slide.
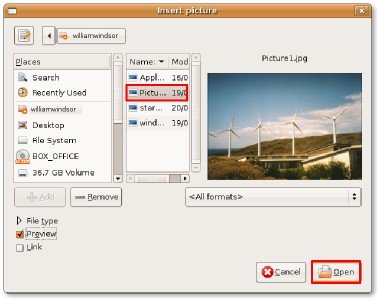
Figure 4.51. Inserting Picture in a Slide
8. Notice that the inserted picture is automatically resized to fit into the provided space. You can also insert an image by selecting Picture from the Insert menu. A picture inserted in this way is not automatically resized, but you can move and resize it as needed. You can insert new slides in a similar fashion.
Now, you are ready to display your presentation as a slide show. To configure the basic slide show setting, select Slide Show Settings from the Slide Show menu.
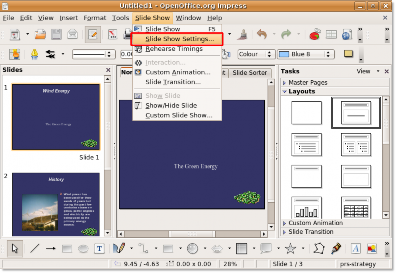
Figure 4.52. Setting up a Slide Show
9. The Slide Show dialogue box helps you define the basic settings for your slide show. In the Range section, you can specify the slides to be included in the presentation and their order of display. In the Type section, you can define how to display the slides. Similarly, the Options section allows you to define various other settings for your presentation.
After selecting the desired options, click OK to apply the settings.
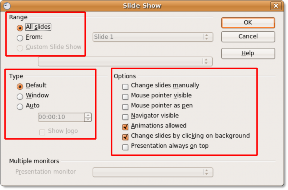
Figure 4.53. Configuring the Slide Show Settings
10. To start the slide show select Slide Show from the Slide Show menu or press F5.
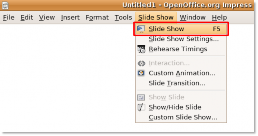
Figure 4.54. Starting the Slide Show
11. The presentation can be viewed as a running slide show. When you reach the last slide of the presentation, you are prompted to exit the presentation by clicking once. However, you can exit a slide show at any point of time by pressing ESC.
12. You can choose to print your slides with notes, as an outline, with page numbers, with date and time and so on. To do this, select Print from the File menu.
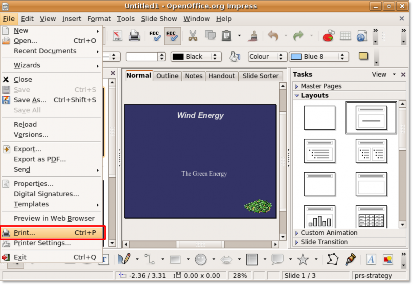
Figure 4.55. Printing the Presentation
13. You can use the Print dialogue box to further define printer settings or accept the default settings, and click
OK to start printing your presentation.
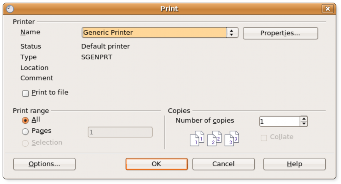
Figure 4.56. Defining Printer Settings Procedure 4.11. Animating Objects and 3D Objects
To create a presentation with 3D effects and animations:
1. Open a new presentation in which you want to use 3D graphics and animations, and select a suitable tem- plate from the Master pages panel. Now, you can start adding elements to your presentation to spice it up. Begin with placing the title of your presentation on the first slide.
To create an eye-catching display for the title text, you can use one of the many wonderful text tools available in Impress. One of these is Fontwork, which enables you to create special 3D effects to your text. To start using Fontwork, on the Drawing toolbar, click the Fontwork Gallery button. The Fontwork Gallery window appears.
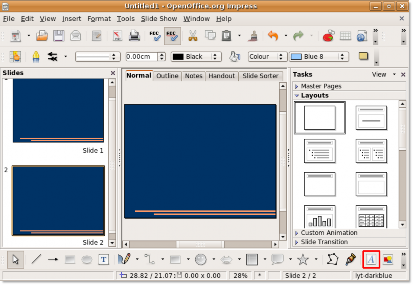
Figure 4.57. Opening Fontwork Gallery
2. Select the style in which you want the title text to be displayed, and click OK.
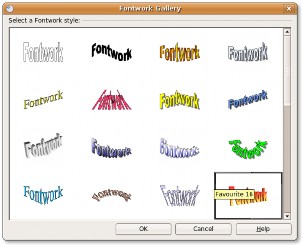
Figure 4.58. Selecting a Fontwork Style
3. The text Fontwork, in the selected style, appears on the slide as an object. To display the title text in place of the Fontwork object, double-click the object and type the title text in place of the black Fontwork that appears over the object. Click outside the object's selected area to exit the Fontwork edit mode.
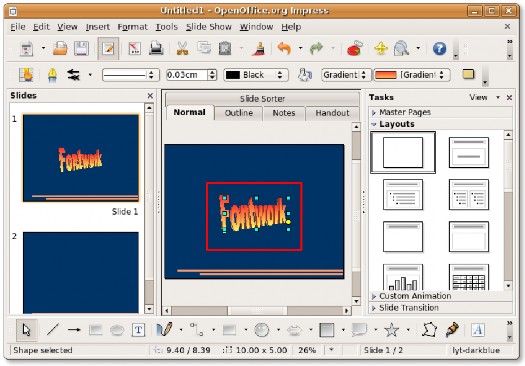
Figure 4.59. Editing the Fontwork Object
4. You can go ahead and do the same on the other slides too by inserting 3D images and animating them.
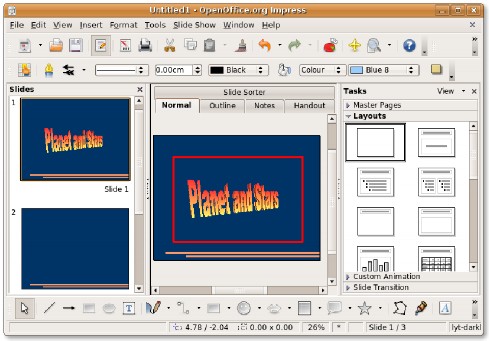
Figure 4.60. The 3D Text
5. You can insert 3D graphic objects in your presentation from the 3D-Objects toolbar. By default, this toolbar is not displayed on the Drawing toolbar. To display the 3D-Objects toolbar, on the View menu, point to Toolbars and then click 3D-Objects.
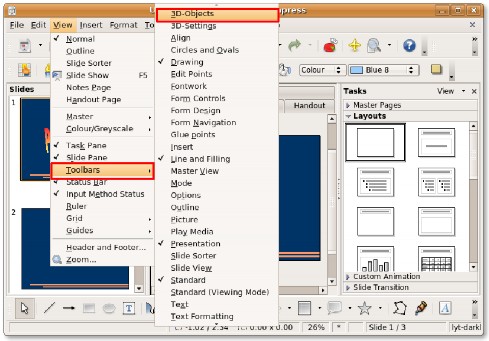
Figure 4.61. Inserting 3D Graphics
![]() Nice to Know:
Nice to Know:
You can also display the 3D-Objects toolbar by clicking the small arrow at the end of the
Drawing toolbar and selecting it from the Visible Buttons list.
6. The 3D-Objects toolbar appears as a floating toolbar. If you do not like floating toolbars, you can place it on one of the existing toolbars. To dock the 3D-Objects toolbar, drag the title bar of the toolbar to the desired location and release the mouse button.

Figure 4.62. The 3D-Objects Toolbar
7. The 3D-Objects toolbar is now attached to the Line and Filling toolbar. You can pick up objects from this toolbar and insert them into your slides. To insert a 3D Object on your current slide, click the desired object on the 3 D-Objects toolbar. Then, move your mouse to the point where you want to insert the object. You can see a plus sign in place of the mouse tip. Holding down the left mouse button, drag the mouse to insert the object on the slide. The selected 3D object appears on the slide.

Figure 4.63. Inserting a 3D Object
8. You can change the proportion and size of the object by holding the green handles that appear around it. Impress also provides you tools to apply a number of 3D effects on the object to modify its look and feel as per your requirements. To apply 3D effects on the inserted graphic, right-click the object. On the short- cut menu, click 3D Effects. The 3D Effects dialogue box opens.

Figure 4.64. Applying 3D Effects
9. You can use the options available under the different buttons in this dialogue box to define the look and feel of the inserted object. Click the Illumination button to fine- tune the illumination effect on the object. You can select the appropriate options from the drop-down lists to render the desired illumination effect to the object. Alternatively, you can simply drag the white dot in the graphic at the bottom of the dialogue box and move it to get the desired effect.
10. After specifying the desired options, click the Assign icon on the top right of the dialogue box to apply the effects on the selected object. Click Close to exit the 3D Effects dialogue box.
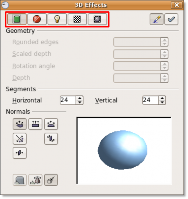
Figure 4.65. Defining 3D Effects
11. Notice that with a couple of mouse clicks, the 3D object takes on a completely new look. In a similar fashion, you can add many more 3D and 2D elements to your presentation and apply various 3D effects to jazz it up. Impress also offers some animation functionality to help you bring life to your presentations. To display the animation options available in Impress, on the Slide Show menu, click Custom Animation.
The Custom Animations panel now appears on the right edge of the presentation window.
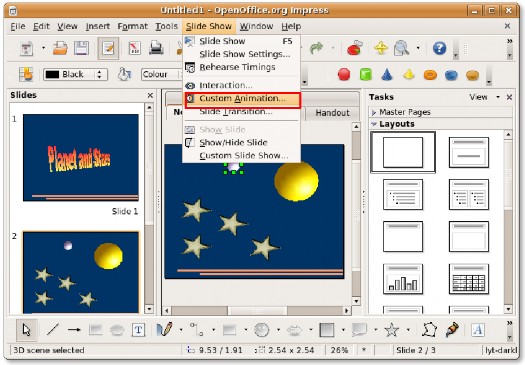
Figure 4.66. Applying Custom Animation
12. To apply an animation effect on an individual element in your slide, select that element and click the Add
button on the Custom Animation panel. The Custom Animation dialogue box opens.
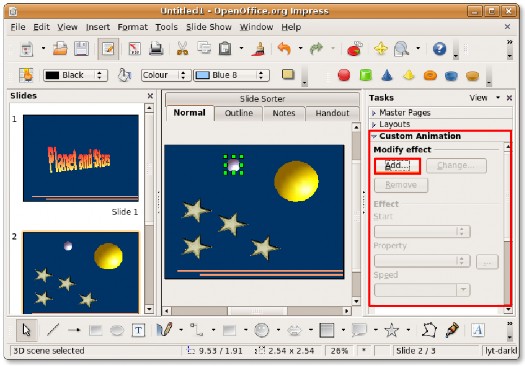
Figure 4.67. Animating Objects
13. You can now apply various animations to the selected object, define the entrance and exit animation for it and chart a motion path for the object. Similarly, you can specify animation effects for other elements on the slides.
After defining all the desired settings for the object, click OK to apply the animation effects.
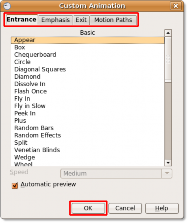
Figure 4.68. Customising Animation Effects
14. The specified animations can be viewed at the bottom of the Custom Animations panel. You can now view the animation effects in a slide show. Click the Slide Show button to view the presentation as a slide show.
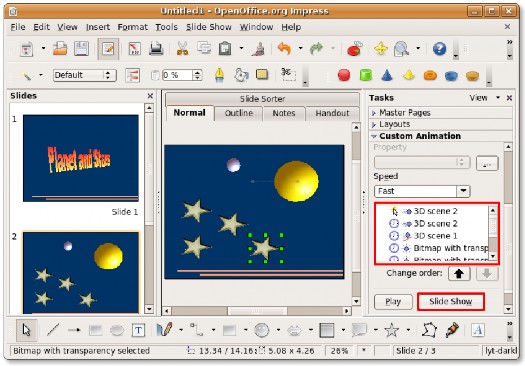
Figure 4.69. Launching a Slide Show
15. Your presentation will now run as a slide show.

Figure 4.70. The Slide Show
Exporting a Presentation. As stated earlier, another useful feature associated with Impress is that it has the built-in capacity to export presentations directly into several other file formats. As a result, Impress allows you to export your slide shows directly as Flash (SWF) files.
Procedure 4.12. To export your presentation as an SWF file:
1. On the File menu, click Export. This opens the Export dialogue box.
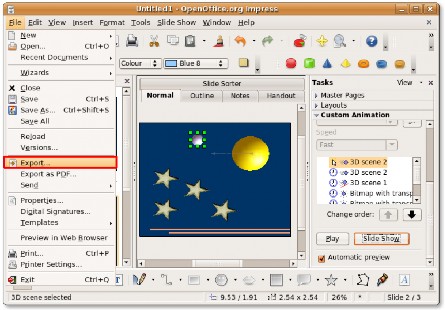
Figure 4.71. Exporting a Presentation
2. Here, you need to specify a file name in the Name field and navigate to the directory where you want to export the file. To export the presentation as a Flash file, select Macromedia Flash (SWF) (.swf) from
the file type drop-down list and click Save. The file is exported to the indicated location. You can now view the presentation as a Flash file.
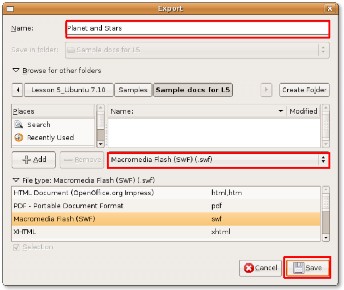
Figure 4.72. Exporting Presentation as a Flash File