
< Previous | Contents | Next >
4.6.2. Creating and Editing Formulae
Though Math can be used with all the OpenOffice.org applications, it is primarily used as an equation editor with text documents.
Procedure 4.23. To be able to use Math when working with Writer perform the following steps:
1. Position the cursor on the document where you want to insert the formula. On the Insert menu, point to
Object and then click Formula.
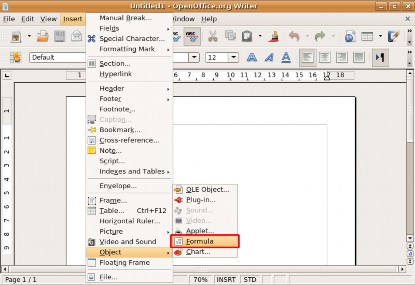
Figure 4.90. Launching Math
2. This invokes Math from inside the Writer window. Notice that the equation editor appears at the bottom of the document window. You can now access all the Math tools from inside the Writer window. A placeholder box appears besides the text where the equation is to be entered.
The simplest method to enter an equation in your document is to use the Selection window. By default, the
Selection window is not displayed. To display the Selection window, on the View menu, click Selection.
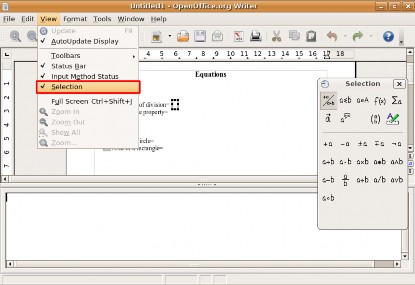
Figure 4.91. Displaying the Selection Window
3. The Selection window appears as a floating toolbar. Notice that the Selection window is divided into two halves. The upper half contains the symbol categories, and the lower half displays the symbols available in the selected category. You can now start inserting the equation by selecting the symbols from the Selection window.
To insert a symbol, such as "a/b" select the appropriate category from the upper half and click the appro- priate symbol from the lower half of the Selection window.
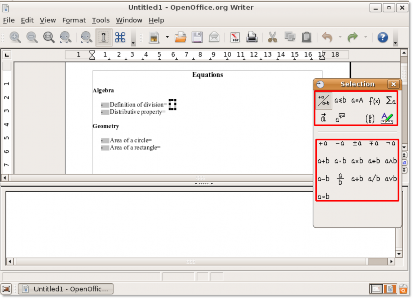
Figure 4.92. Using the Selection Window
4. You will notice that when you select the symbol on the Selection window, the markup for the selected symbol appears in the equation editor. Simultaneously, some grey boxes appear in the main text body.
The <?> symbols appearing in the equation editor are placeholders where you need to enter the actual text or symbol associated with your formula.
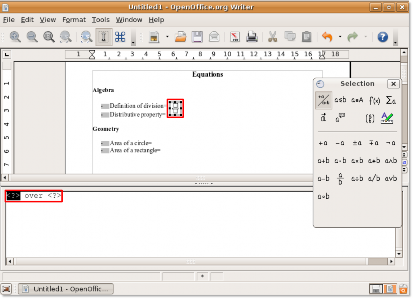
Figure 4.93. Inserting Symbols
5. As you enter the required text or symbol into the placeholders, the grey boxes are simultaneously updated with the equation. You can enter the rest of the equation in the same fashion.
6. Once you enter the complete equation using the Selection window, the equation appears as an object in your document window and you can view the complete markup for the equation in the equation editor. Exit the formula editor by clicking anywhere on the document body.
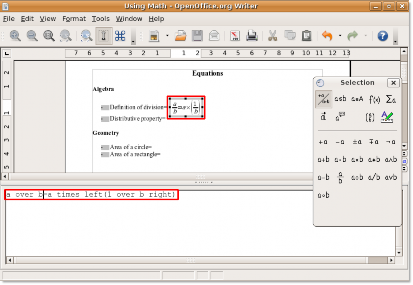
Figure 4.94. The Inserted Equation
7. Once the formula is inserted in your document, you may want to modify it further. To edit a formula right- click once on it and select Edit from the short-cut menu.
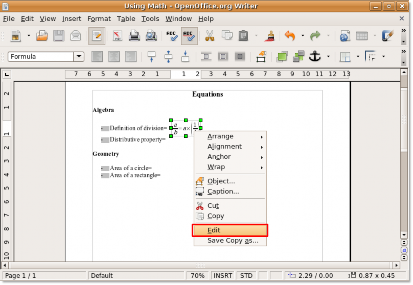
Figure 4.95. Editing Equation
8. Now you can insert new symbols into your formula or delete ones you no longer need.
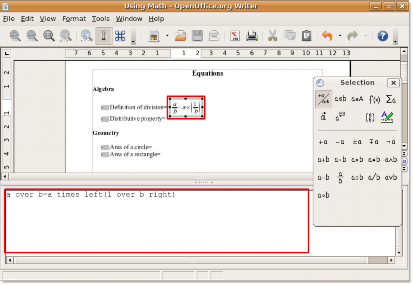
Figure 4.96. Inserting New Symbols
9. Though Greek characters are widely used in mathematical formulae, especially geometric formulae, these characters are not available in either the Selection window or the Context menu.
10. You can enter Greek characters by typing the markup language for them in the equation editor. Alterna- tively, you can use the Catalog window. To display the Catalog window, on the Tools menu, click Catalog.
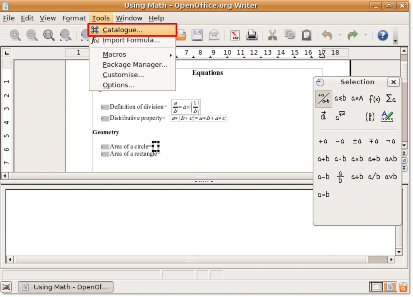
Figure 4.97. Launching the Catalogue Window
11. The Symbols dialogue box is displayed. Before selecting a character, ensure that Greek is selected under the Symbol set drop-down window. Select the required Greek character from the Symbols window and click Insert.
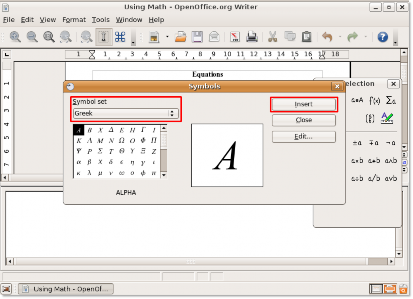
Figure 4.98. Inserting Greek Symbols
12. The character is inserted into your document and the markup is displayed in the equation editor. You can continue entering formulas into your document following the same procedure. Once you have entered all the required formulae, your document may appear like this:
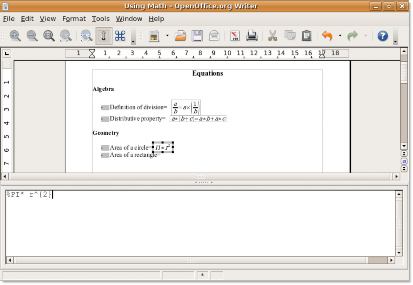
Figure 4.99. Final Equations