
< Previous | Contents | Next >
VirtualBox
After the initial installation, VirtualBox’s main screen looks something like Figure 2.6, “Virtual- Box’s Start Screen” [page 26].
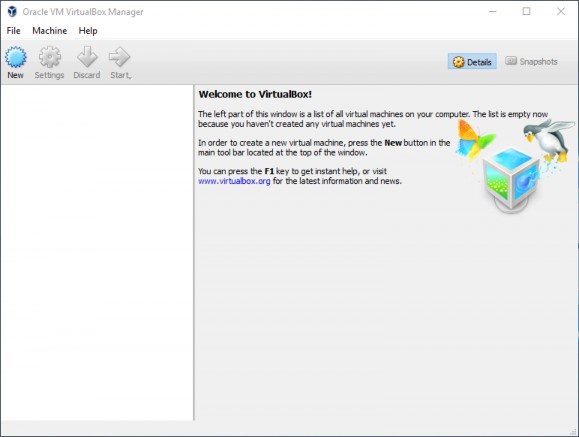
Figure 2.6 VirtualBox’s Start Screen
Click on New (Figure 2.7, “Name and Operating System” [page 27]) to start a wizard that will guide you through the multiple steps required to input all the parameters of the new virtual machine.
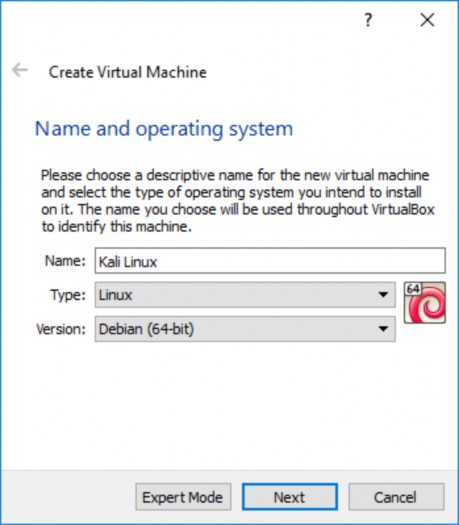
Figure 2.7 Name and Operating System
In the first step, shown in Figure 2.7, “Name and Operating System” [page 27], you must assign a name to your new virtual machine. Use “Kali Linux.” You must also indicate what kind of operat- ing system will be used. Since Kali Linux is based on Debian GNU/Linux, select Linux for the type and Debian (32-bit) or Debian (64-bit) for the version. Although any other Linux version will most likely work, this will help distinguish between the various virtual machines that you might have installed.
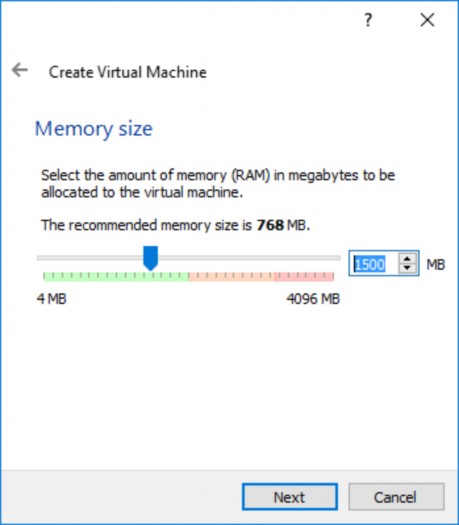
Figure 2.8 Memory Size
In the second step, you must decide how much memory to allocate to the virtual machine. While the recommended size of 768 MB is acceptable for a Debian virtual machine acting as a server, it is definitely not enough to run a Kali desktop system, especially not for a Kali Linux live system since the live system uses memory to store changes made to the file system. We recommend increasing the value to 1500 MB (Figure 2.8, “Memory Size” [page 28]) and highly recommend that you allocate no less than 2048 MB of RAM.
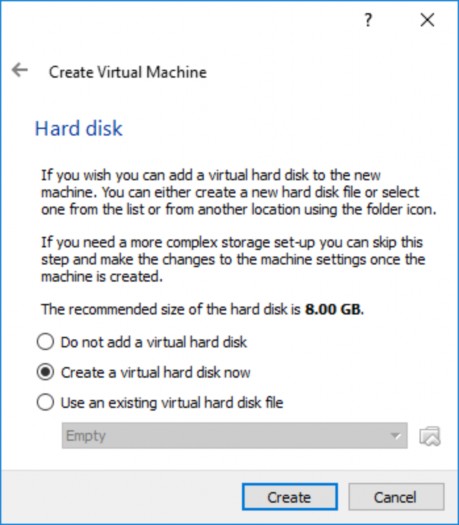
Figure 2.9 Hard disk
In the third step (shown in Figure 2.9, “Hard disk” [page 29]), you are prompted to choose a physi- cal or virtual hard disk for your new virtual machine. Although a hard disk is not required to run Kali Linux as a live system, add one for when we demonstrate the installation procedure later, in chapter 4, “Installing Kali Linux” [page 66].
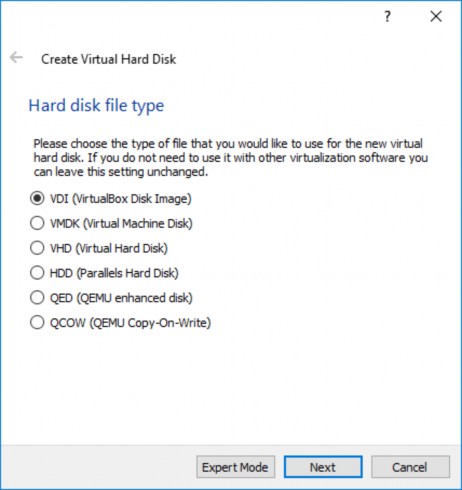
Figure 2.10 Hard Disk File Type
The content of the hard disk of the virtual machine is stored on the host machine as a file. Virtu- alBox is able to store the contents of the hard disk using multiple formats (shown in Figure 2.10, “Hard Disk File Type” [page 30]): the default (VDI) corresponds to VirtualBox’s native format; VMDK is the format used by VMware; QCOW is the format used by QEMU. Keep the default value, because you don’t have any reason to change it. The ability to use multiple formats is interesting mainly when you want to move a virtual machine from one virtualization tool to another.
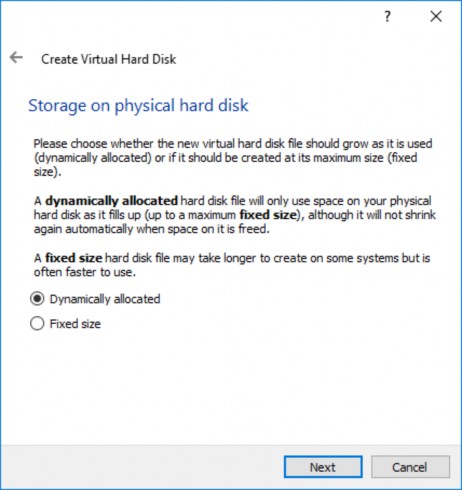
Figure 2.11 Storage on Physical Hard Disk
The explanation text in Figure 2.11, “Storage on Physical Hard Disk” [page 31] clearly describes the advantages and drawbacks of dynamic and fixed disk allocation. In this example, we accept the default selection (Dynamically allocated), since we are using a laptop with SSD disks. We don’t want to waste space and won’t need the extra bit of performance as the machine is already quite fast to begin with.
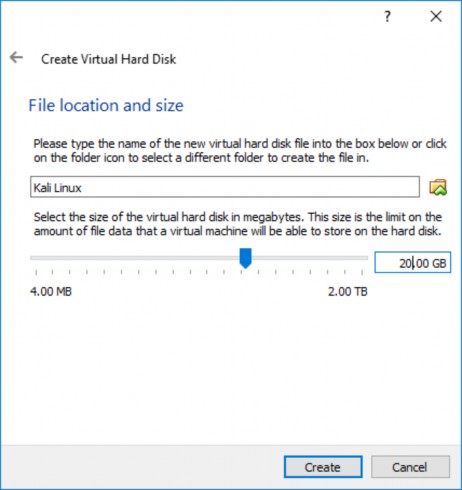
Figure 2.12 File Location and Size
The default hard disk size of 8 GB shown in Figure 2.12, “File Location and Size” [page 32] is not enough for a standard installation of Kali Linux, so increase the size to 20 GB. You can also tweak the name and the location of the disk image. This can be handy when you don’t have enough space on your hard disk, allowing you to store the disk image on an external drive.
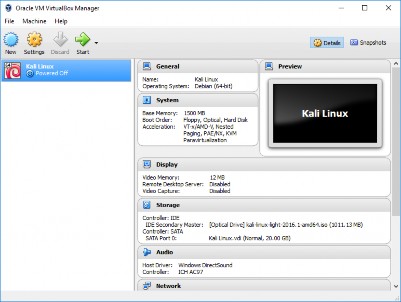
Figure 2.13 The New Virtual Machine Appears in the List
The virtual machine has been created but you can’t really run it yet, because there is no operating system installed. You also have some settings to tweak. Click on Settings on the VM Manager screen and let’s review some of the most useful settings.
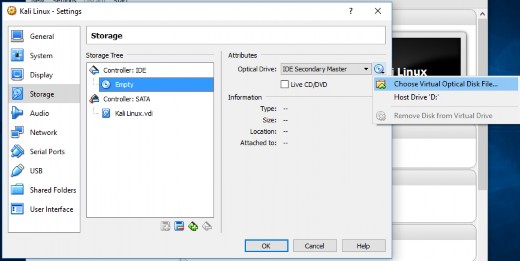
Figure 2.14 Storage Settings
In the Storage screen (Figure 2.14, “Storage Settings” [page 33]), you should associate the Kali Linux ISO image with the virtual CD/DVD-ROM reader. First, select the CD-ROM drive in the Stor- age Tree list and then click on the small CD-ROM icon on the right to display a contextual menu where you can Choose Virtual Optical Disk File....
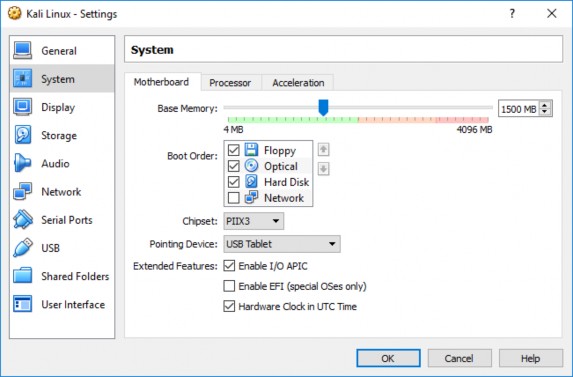
Figure 2.15 System Settings: Motherboard
In the System screen (Figure 2.15, “System Settings: Motherboard” [page 34]), you will find a Moth- erboard tab. Make sure that the boot order indicates that the system will first try to boot from any optical device before trying a hard disk. This is also the tab where you can alter the amount of memory allocated to the virtual machine, should the need arise.
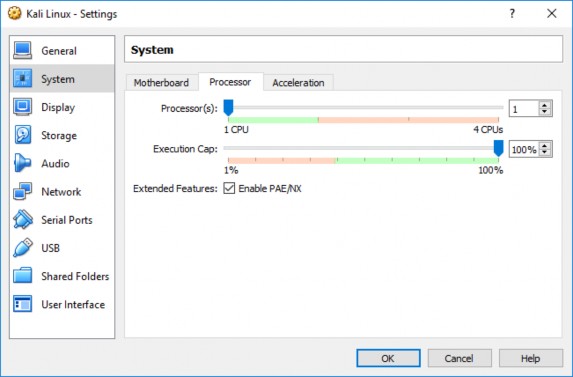
Figure 2.16 System Settings: Processor
In the same screen but on the “Processor” tab (Figure 2.16, “System Settings: Processor” [page 35]), you can adjust the number of processors assigned to the virtual machine. Most importantly, if you use a 32-bit image, enable PAE/NX or the Kali image will not boot since the default kernel variant used by Kali for i386 (aptly named “686-pae”) is compiled in a way that requires Physical Address Extension (PAE) support in the CPU.
There are many other parameters that can be configured, like the network setup (defining how the traffic on the network card is handled), but the above changes are sufficient to be able to boot a working Kali Linux live system. Finally, click Boot and the VM should boot properly, as shown in Figure 2.17, “Kali Linux Boot Screen in VirtualBox” [page 36]. If not, carefully review all settings and try again.
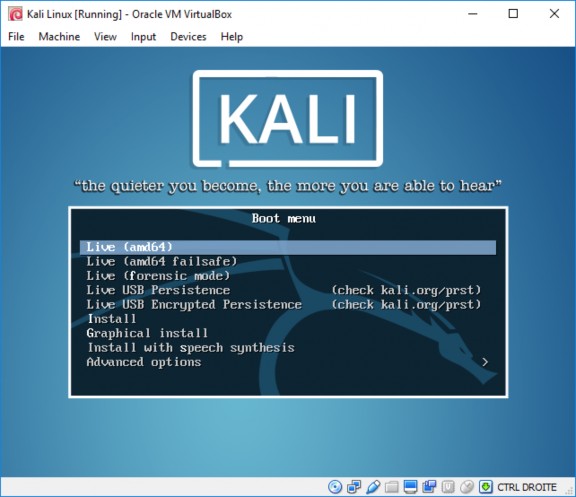
Figure 2.17 Kali Linux Boot Screen in VirtualBox