
< Previous | Contents | Next >
VMware
VMware Workstation Pro is very similar to VirtualBox in terms of features and user interface, be- cause they are both designed primarily for desktop usage, but the setup process for a new virtual machine is a bit different.
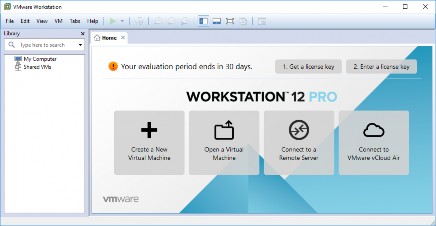
Figure 2.18 VMware Start Screen
The initial screen, shown in Figure 2.18, “VMware Start Screen” [page 37], displays a big Create a New Virtual Machine button that starts a wizard to guide you through the creation of your virtual machine.
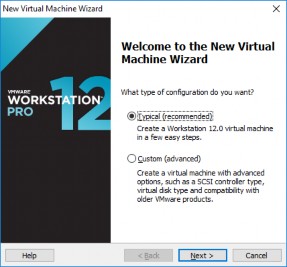
Figure 2.19 New virtual Machine Wizard
In the first step, you must decide whether you want to be presented with advanced settings dur- ing the setup process. In this example, there are no special requirements so choose the typical installation, as shown in Figure 2.19, “New virtual Machine Wizard” [page 37].
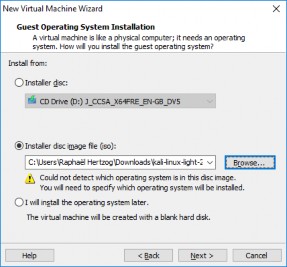
Figure 2.20 Guest Operating System Installation
The wizard assumes that you want to install the operating system immediately and asks you to select the ISO image containing the installation program (Figure 2.20, “Guest Operating System Installation” [page 38]). Select “Installer disc image file (iso)” and click on Browse to select the image file.
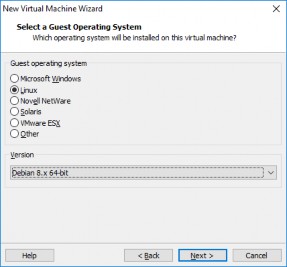
Figure 2.21 Select a Guest Operating System
When the operating system (OS) cannot be detected from the selected ISO image, the wizard asks you which guest OS type you intend to run. You should select “Linux” for the OS and “Debian 8.x” for the version, as shown in Figure 2.21, “Select a Guest Operating System” [page 38].
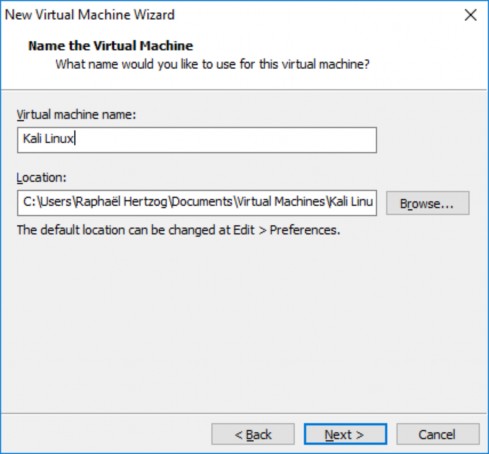
Figure 2.22 Name the Virtual Machine
Choose ”Kali Linux” as the name of the new virtual machine (Figure 2.22, “Name the Virtual Ma- chine” [page 39]). As with VirtualBox, you also have the option to store the VM files in an alternate location.
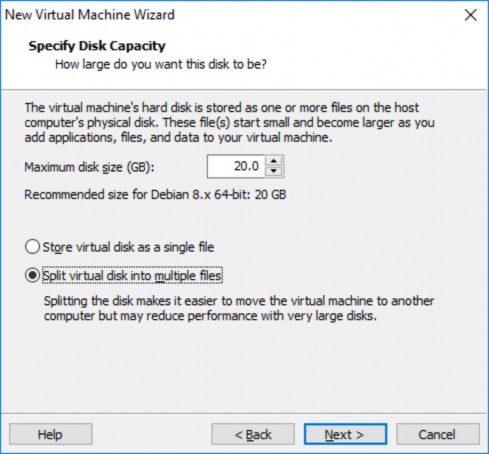
Figure 2.23 Specify Disk Capacity
The default hard disk size of 20 GB (Figure 2.23, “Specify Disk Capacity” [page 40]) is usually suf- ficient but you can adjust it here depending on your expected needs. As opposed to VirtualBox, which can use a single file of varying size, VMware has the ability to store the disk’s content over multiple files. In both cases, the goal is to conserve the host’s disk space.
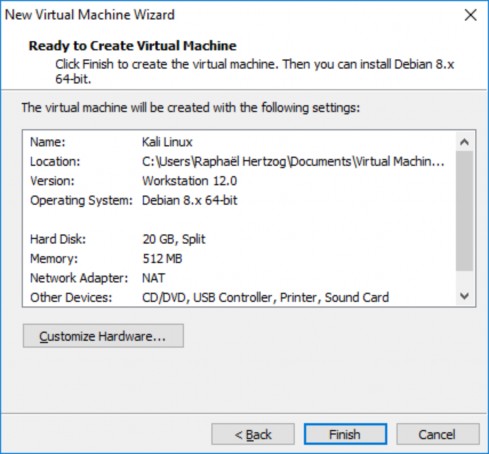
Figure 2.24 Ready to Create Virtual Machine
VMware Workstation is now configured to create the new virtual machine. It displays a summary of the choices made so that you can double-check everything before creating the machine. Notice that the wizard opted to allocate only 512 MB of RAM to the virtual machine, which is not enough so click on Customize Hardware... (Figure 2.24, “Ready to Create Virtual Machine” [page 41]) and tweak the Memory setting, as shown in Figure 2.25, “Configure Hardware Window” [page 42].
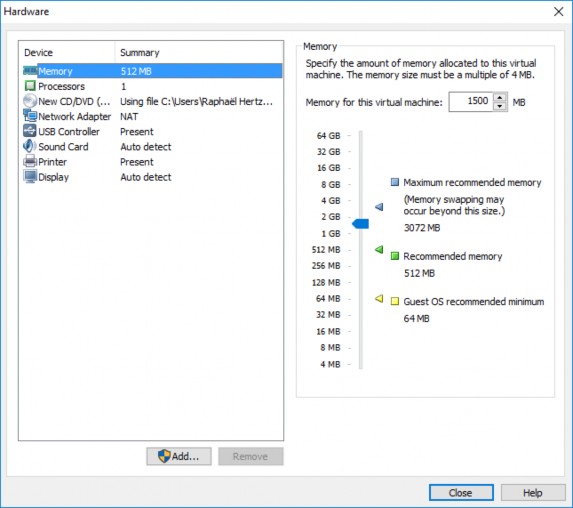
Figure 2.25 Configure Hardware Window
After a last click on Finish (Figure 2.24, “Ready to Create Virtual Machine” [page 41]), the virtual machine is now configured and can be started by clicking ”Power on this virtual machine” as shown in Figure 2.26, “Kali Linux Virtual Machine Ready” [page 43].
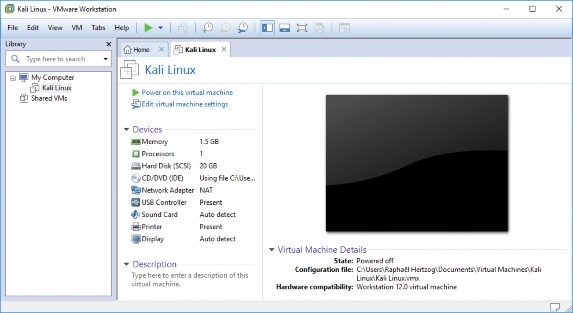
Figure 2.26 Kali Linux Virtual Machine Ready