
< Previous | Contents | Next >
4.5. Troubleshooting Installations
The installer is quite reliable, but you may encounter bugs or face external problems such as: net- work problems, bad mirrors, and insufficient disk space. Because of this, it is quite useful to be able to troubleshoot problems that appear in the installation process.
When the installer fails, it will show you a rather unhelpful screen such as the one shown in Fig- ure 4.26, “Installation Step Failed” [page 96].
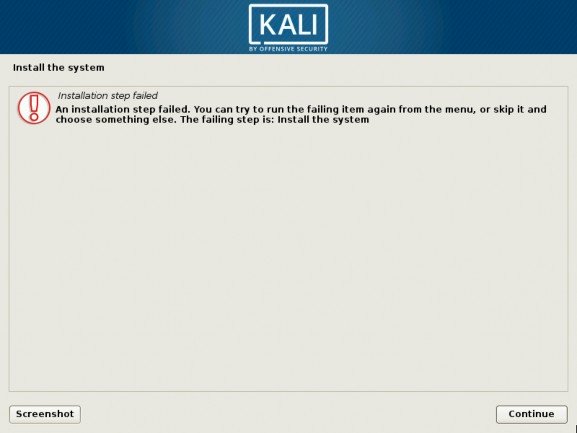
Figure 4.26 Installation Step Failed
At this point, it is good to know that the installer makes use of multiple virtual consoles: the main screen that you see is running either on the fifth console (for the graphical installer, CTRL+Shift+F5) or on the first console (for the textual installer, CTRL+Shift+F1). In both cases, the fourth console (CTRL+Shift+F4) displays logs of what is happening and you can usually see a more useful error message there, such as the one in Figure 4.27, “The Log Screen of the Installer” [page 97], which reveals that the installer has run out of disk space.
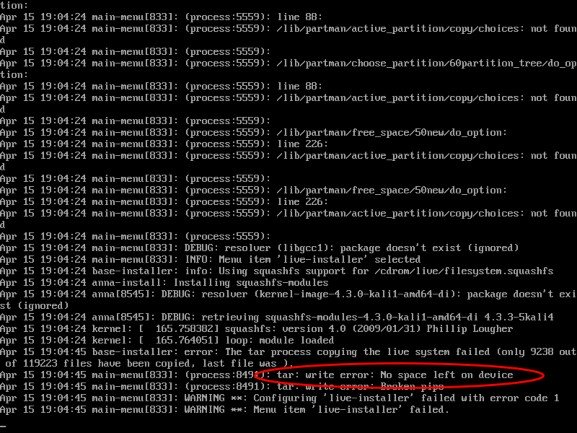
Figure 4.27 The Log Screen of the Installer
The second and third consoles (CTRL+Shift+F2 and CTRL+Shift+F3, respectively) host shells that you can use to investigate the current situation in more detail. Most of the command line tools are provided by BusyBox so the feature set is rather limited, but it is enough to figure out most of the problems that you are likely to encounter.
What Can be Done in the You can inspect and modify the debconf database with debconf-get and debconf-
Installer Shell set. These commands are especially convenient for testing preseeding values.
You can inspect any file (such as the full installation log available in /var/log/ syslog) with cat or more. You can edit any file with nano, including all files be- ing installed onto the system. The root file system will be mounted on /target once the partitioning step of the installation process has completed.
Once network access has been configured, you can use wget and nc (netcat) to retrieve and export data over the network.
Once you click Continue from the main installer failure screen (Figure 4.26, “Installation Step Failed” [page 96]), you will be returned to a screen that you will normally never see (the Main Menu shown in Figure 4.28, “Main Menu of the Installer” [page 98]), which allows you to launch one installation step after another. If you managed to fix the problem through the shell access (congratulations!) then you can retry the step that failed.
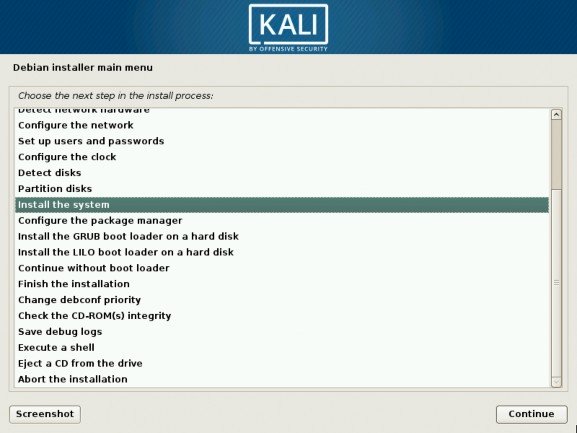
Figure 4.28 Main Menu of the Installer
If you are unable to resolve the problem, you might want to file a bug report. The report must then include the installer logs, which you can retrieve with the main menu’s “Save debug logs” function. It offers multiple ways to export the logs, as shown in Figure 4.29, “Save Debug Logs (1/2)” [page 99].
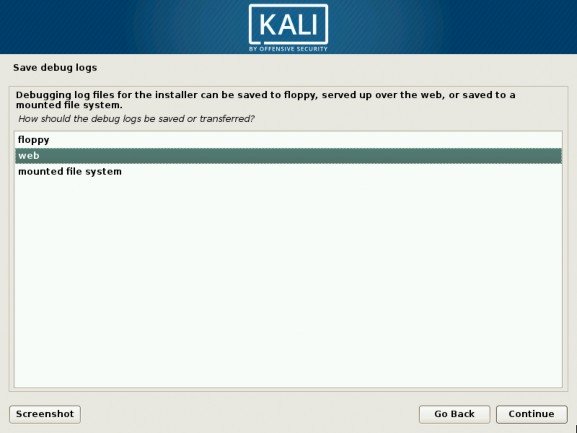
Figure 4.29 Save Debug Logs (1/2)
The most convenient method, and the one that we recommend, is to let the installer start a web server hosting the log files (Figure 4.30, “Save Debug Logs (2/2)” [page 100]). You can then launch a browser from another computer on the same network and download all the log files and screen- shots that you have taken with the Screenshot button available on each screen.
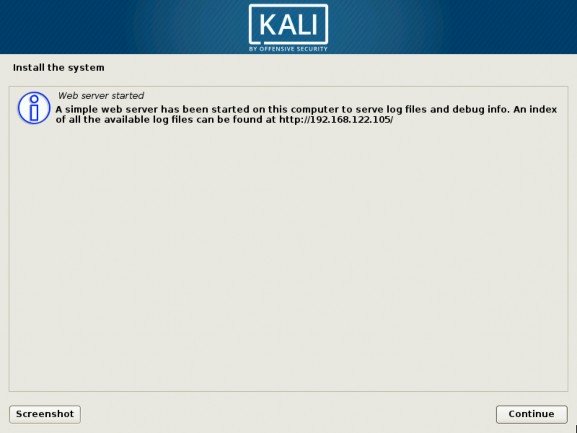
Figure 4.30 Save Debug Logs (2/2)