
< Previous | Contents | Next >
6.6. Using Synaptic Package Manager
Add/Remove Applications does not enable you to install and remove some more advanced packages, such as the Apache web server, the PHP programming language or Scribe. In such cases, use Synaptic Package Manager.
You can install, remove, configure or upgrade software packages, browse, sort and search the list of available software packages, manage repositories or upgrade the whole system. You can queue up a number of actions before you execute them. Synaptic informs you about the additional packages required by the software package you have chosen as well as conflicts with other packages that are already installed on your system. In addition, it presents more information such as package status, origin and filters.
Procedure 6.10. To add and remove any package using Synaptic Packager Manager:
1. On the System menu, point to Administration and then click Synaptic Package Manager.
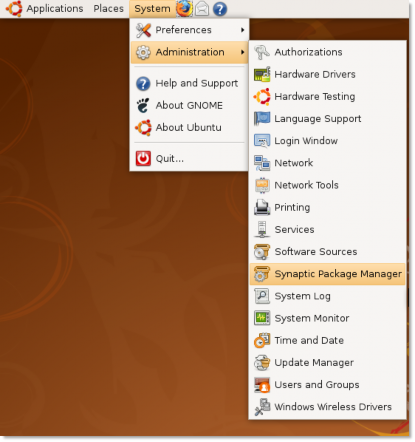
Figure 6.40. Launching Synaptic Package Manager
2. In the Synaptic Package Manager dialogue box, you can select the package you need. The left pane lists the categories, and the right pane lists the packages. If you do not know the name of the package, select the category in the left pane to filter the list of packages. You can then select the check box next to the required package in the right pane.
![]() Note:
Note:
If you want to view the installed and uninstalled packages, click Status. To know the source
repository of the package, click Origin. Click Custom Filters if you want to know the whether a package is broken or can be upgraded.
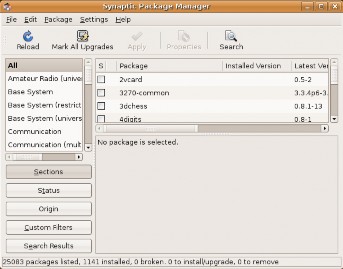
Figure 6.41. Synaptic Package Manager Window
3. If you know the name of the package, click Search. The Find dialogue box opens. Type the name of the package in the Search field and click Search.
![]() Note:
Note:
To return to the list of categories after searching the packages using Search, click Sections.
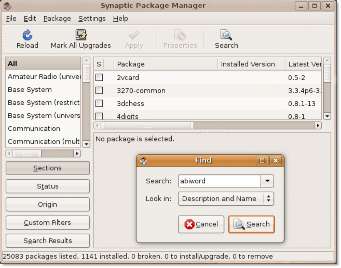
Figure 6.42. Searching a Package to Install
4. Choose the action to be performed on the selected package. Select the Mark for Installation check box to install the package or select the Mark for Removal check box to remove it. If you change your mind, select the Unmark check box.
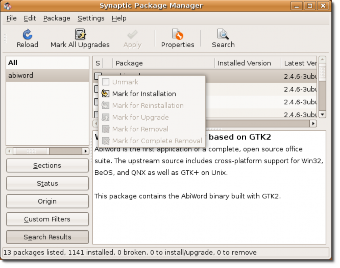
Figure 6.43. Marking the Package for Installation
5. If the package that you choose to remove or install depends on other packages, you will be notified about the dependencies. To continue making changes, click Mark.

Figure 6.44. Confirming Additional Changes
6. To confirm that you want to make the marked changes, click Apply.

Figure 6.45. Applying Changes to Update Software Information
7. The Summary dialogue box opens, prompting you for a final check before making the marked changes. Click Apply to continue with the changes.
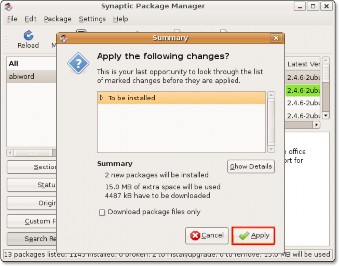
Figure 6.46. Final Confirmation to Install the Package
8. When all the marked changes are made, you are notified about the changes applied. Click Close to close Synaptic Package Manager.
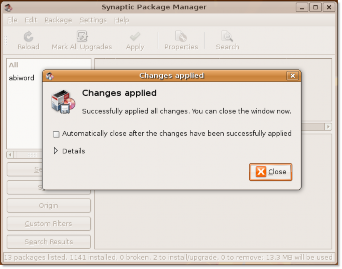
Figure 6.47. Installation Confirmation
This step completes the procedure of installing packages by using Synaptic Package Manager. You can access the installed package by selecting a particular menu, depending on the category of the package. The following figure shows Abiword, which has been installed using this procedure.
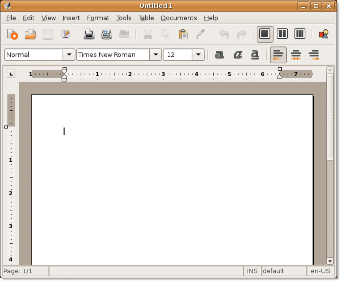
Figure 6.48. Launching the Installed Application - Abiword