
< Previous | Contents | Next >
7.4.2. Creating Vector Graphic Images Using InkScape
Page: This area enables you to specify various options for the output. For example, you can specify the Page dimensions for printing on A4 size paper. The Page adjusts accordingly and you can adjust the proportion the drawing relative to the Page.
Menu Bar: This toolbar provides menus such as file save and zoom. You can perform all operations in Inkscape by using the options listed on these menus.
Command Bar: This toolbar provides shortcuts to major operations on the menu bar.
Drawing Toolbar: This toolbar provides options to perform drawing operations. You can create basic shapes such as a rectangle, a square or an ellipse.
Tools Control Bar: This toolbar provides options specific to a tool on the Drawing toolbar. For example, if you select the polygon tool from the Drawing toolbar, the Tools Control Bar displays options to set the corners in the polygon.
Status Bar: This toolbar indicates the status of objects such as dimensions and layers. For example, when you roll the mouse over the window, the Status Bar indicates the position of the cursor relative to the window.
![]() Note:
Note:
Vector drawing software uses standard notation to refer to shapes such as simple lines, rectangles
and complicated shapes as objects.
Creating and Saving Objects. Creating a new object in Inkscape requires extensive use of the Drawing toolbar. However, the options in this toolbar help you to create basic shapes. To create complex objects, you need to further edit, combine and manipulate these shapes.
Procedure 7.6. To create an object by using the Drawing toolbar:
1. Click the object button associated with the shape you want to draw. Point anywhere in the page where you want to start drawing the object.
2. Drag the cursor to the desired size of the object. The object is displayed in the page.
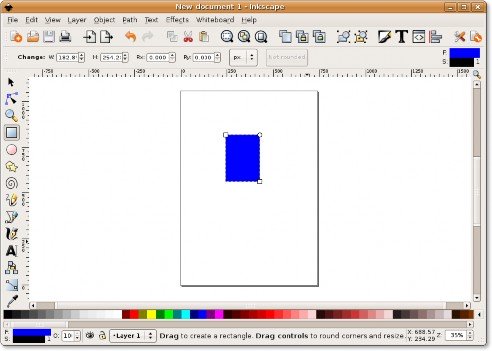
Figure 7.23. Drawing an Object
The Tools Control Bar displays options to create the object. For example, if you are creating a rectangle, the toolbar provides the option to specify the height and the width of the rectangle.
3. After creating the shape, click Save on the Command Bar. The Select file to Save to dialogue box is displayed. Type the name of the file in the Name text box, specify the location where you want to save the file and click Save.

![]()
Note:
Figure 7.24. Saving an Object
Inkscape saves images as vector graphics. You can resize a vector image without affecting the resolution of the image.